
Joaquin Cid
Verified Expert in Engineering
Joaquin是一名全栈和混合移动应用程序开发人员,在WebMD和Getty Images等公司工作了超过12年的经验.
Previously At

Joaquin是一名全栈和混合移动应用程序开发人员,在WebMD和Getty Images等公司工作了超过12年的经验.
Angular 6 is out! 最显著的变化是它的CLI以及如何注入服务. 如果你想在本教程中编写你的第一个Angular 6应用程序——或者Angular/Firebase应用程序, 我们将回顾初始设置的基本步骤并创建一个小型日记应用程序.
If you’ve never used Angular 在此之前,让我给你一个简短的描述,以及它是如何工作的.
Angular是一个JavaScript框架,旨在支持构建 单页面应用程序 (spa)适用于桌面和移动设备.
该框架包括一整套指令和模块,允许你轻松实现一些最常见的web应用场景, like navigation, authorization, forms, and reporting. 它还附带了所有必要的包,可以使用Jasmine框架添加测试,并使用Karma或Protractor测试运行器运行它们.
Angular架构是基于组件、模板、指令和服务的. 它为你的服务提供了一个内置的依赖注入机制, 以及将视图与组件代码连接起来的双向数据绑定.
Angular使用TypeScript, JS的类型化超集, 而且会让一些事情变得更容易, 特别是如果你有打字的背景.
A brief summary of new features in Angular 6:
@angular/core, @angular/common, @angular/compiler, etc.)、CLI、Material和CDK. 这将有助于使交叉兼容性更加清晰:您可以通过快速浏览版本号来判断密钥包是否彼此兼容.ng CLI commands:
ng update 要聪明地升级包版本,就要更新依赖项版本并使它们保持同步. (E.g. when running 更新@angular/core all frameworks will be updated as well as RxJS.) It will also run schematics 如果包中包含它们. (如果新版本包含需要更改代码的破坏性更改, the schematic will update your code for you.)ng add 添加新包(并运行脚本,如果适用的话)作为最后一个更改的含义的示例,您的代码以前看起来像:
@NgModule({
  // ...
  供应商(MyService):
})
在Angular 6中做了这个特别的改变后,它看起来会是这样的:
@Injectabe({
  providedIn: 'root',
})
These are called tree-shakeable提供者 并允许编译器删除未引用的服务,从而生成更小的包.
The ng 命令行界面是Angular中非常重要的一部分,它可以让你在编写应用程序时更快地移动.
有了CLI,你可以很容易地搭建你的初始应用程序, 生成新组件, directives, etc, 在本地环境中构建和运行你的应用.
Okay, enough talk. Let’s get our hands dirty and start coding.
To start, you’ll need Node.js and npm 安装在您的机器上.
Now, let’s go ahead and install the CLI:
NPM install -g @angular/cli
This will install the ng CLI命令,由于 -g switch.
有了这个之后,我们就可以用 ng new:
新的my-memories -style=scss
This will create a my-memories folder, 创建所有必要的文件,为启动初始设置做好准备, 并安装所有必要的软件包. The --style=scss switch是可选的,它将设置编译器将SCSS文件编译为CSS,这是我们稍后需要的.
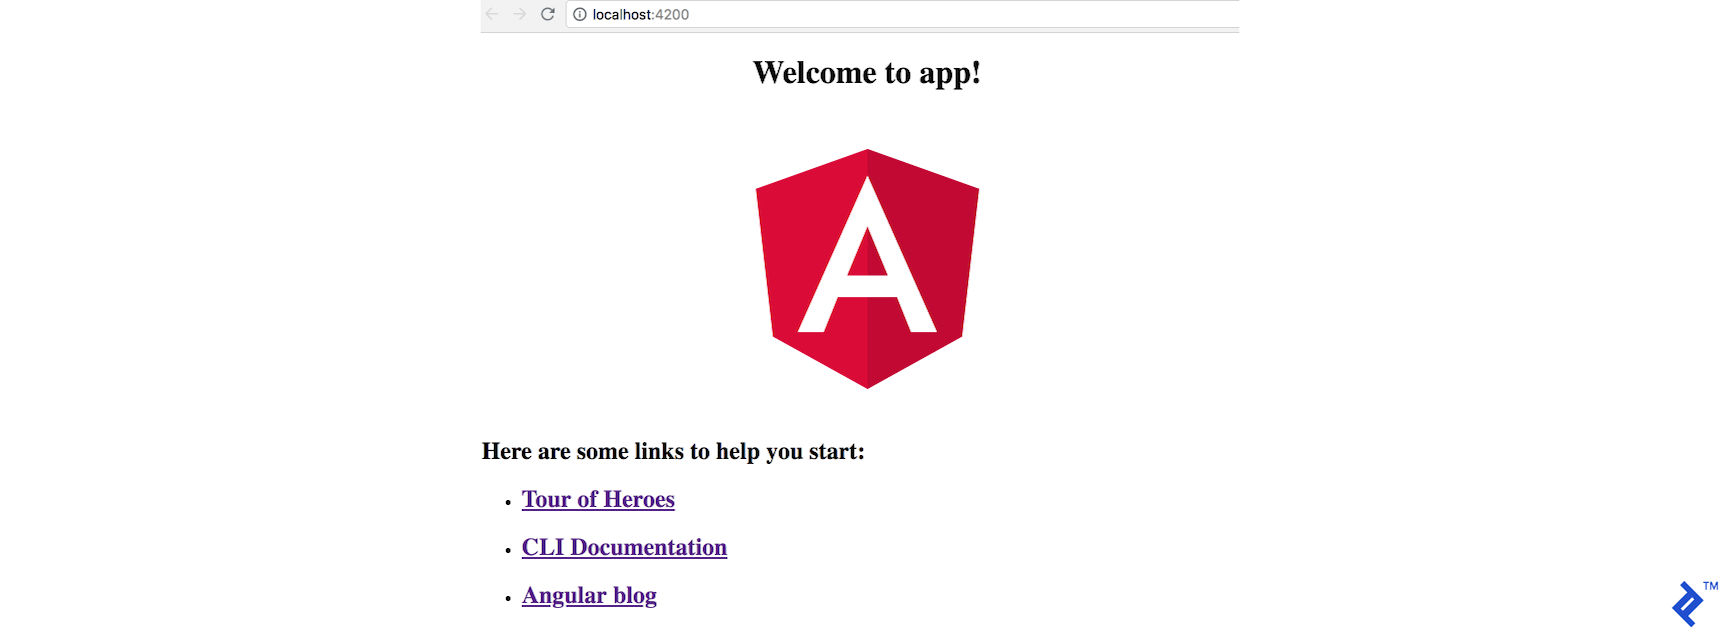
Once the install is complete, you can cd my-memories and run ng serve. 这将启动构建过程和为应用程序提供服务的本地web服务器 http://localhost:4200.
在幕后发生的事情是CLI编译所有的 .ts (TypeScript文件)到vanilla JS,从packages文件夹中收集所有必需的依赖项 node_modules, 并将结果输出到一组文件中,这些文件通过运行在端口4200上的本地web服务器提供服务.
如果你不熟悉Angular的项目文件夹结构, 您需要知道的最重要的事情是,与应用程序相关的所有代码都在 src folder. 您通常会在该文件夹中创建所有模块和指令 遵循应用程序架构 (e.g. user, cart, product.)

到目前为止,我们已经完成了app的初始设置. 让我们开始做一些改变.
Before we start, let’s dig into the src folder a bit. The initial page is index.html:
MyMemories
Here we see some basic HTML and the
We’ll find the app/app.component.ts 文件,它具有选择器 app-root 来匹配 index.html file.
该组件是一个修饰过的TypeScript类,在本例中,它包含了 title property. The @Component decorator告诉Angular在类中包含组件行为. 除了选择器之外,它还指定要呈现哪个HTML文件以及要使用哪些样式表.
import { Component } from '@angular/core';

@Component({
  selector: 'app-root',
  templateUrl: './app.component.html',
  styleUrls: ['./app.component.scss']
})
导出类AppComponent {
  title = 'app';
}
If we look at app.component.html we’ll see the {{title}} interpolation binding. Here’s where all the magic binding happens, Angular会渲染类title属性的值,并在它发生变化时更新它.
Welcome to {{ title }}!

Here are some links to help you start:
让我们继续更新 title from the class to 'My Memories!'.
...
导出类AppComponent {
  title = 'My Memories!';
}
...
我们将看到编译器处理我们的更改,浏览器刷新以显示更新后的标题.
这意味着Angular 6 ng serve 监视我们的文件更改,并在每次更改引入任何文件时呈现.
为了使编码更友好,并避免每次进行更改时刷新整个页面, 我们可以利用webpack热模块替换(HMR), 它只是更新了JS/CSS的块,而不是产生一个完整的刷新来显示你的变化.
First, we need to set up the environment.
Create a file src /环境/环境.hmr.ts 内容如下:
导出const环境= {
  production: false,
  hmr: true
};
Update src /环境/环境.prod.ts and add the hmr: false 环境标志:
导出const环境= {
  production: true,
  hmr: false
};
Then update src /环境/环境.ts and add the hmr: false flag to the environment there as well:
导出const环境= {
  production: false,
  hmr: false
};
Next in the angular.json 文件,更新这部分:
 "projects": {
   "my-memories": {
     // ...
     "architect": {
       "build": {
	  // ...
         "configurations": {
           "hmr":{
             "fileReplacements":[
               {
                 "replace": "src /环境/环境.ts",
                 "with": "src /环境/环境.hmr.ts"
               }
             ]
           },
        // ...
And under projects → my-memories → architect → serve → configurations:
 "projects": {
   "my-memories": {
     "architect": {
     // ...
       "serve": {
	  // ...
         "configurations": {
           "hmr": {
             "browserTarget": "my-memories:build:hmr"
           },
         // ...
Now update tsconfig.app.json 包括必要的 types (嗯,键入)通过在下面加上这个 compilerOptions:
 "compilerOptions": {
   // ...
   "types": [
     "node"
   ]
接下来,我们将安装 @angularclass/hmr module as a development dependency:
npm install --save-dev @angularclass/hmr
Then configure it by creating a file src/hmr.ts:
从“@angular/core”中导入{NgModuleRef, ApplicationRef};
从“@angularclass/hmr”中导入{createNewHosts};

export const hmrBootstrap = (module: any, bootstrap: () => Promise>) => {
  let ngModule: NgModuleRef;
  module.hot.accept();
  bootstrap().then(mod => ngModule = mod);
  module.hot.dispose(() => {
    const appRef: ApplicationRef = ngModule.injector.get(ApplicationRef);
    const elements = appRef.components.map(c => c.location.nativeElement);
    const makeVisible = createNewHosts(elements);
    ngModule.destroy();
    makeVisible();
  });
};
Next, update src/main.ts 要使用上述函数:
import { enableProdMode } from '@angular/core';
从“@angular/platform-browser-dynamic”中导入{platformBrowserDynamic};

导入{AppModule}./app/app.module';
从“导入{环境}”./环境/环境”;

导入{hmrBootstrap}./hmr';

if (environment.production) {
  enableProdMode();
}

const bootstrap = () => platformBrowserDynamic().bootstrapModule (AppModule);

if (environment.hmr) {
  If (module['hot']) {
    hmrBootstrap(模块,引导);
  } else {
    console.error('HMR is not enabled for webpack-dev-server!');
    console.log('Are you using the --hmr flag for ng serve?');
  }
} else {
  bootstrap().catch(err => console.log(err));
}
我们在这里所做的是让bootstrap调用一个匿名函数,然后询问是否 environment.hmr flag is true. 如果是,则调用前面定义的函数 hmr.ts which enabled hot module replacement; otherwise, we bootstrap it as we used to.
Now, when we run Ng serve——hmr——configuration=hmr,我们将调用 hmr 配置,当我们对文件进行更改时,我们将获得更新,而无需完全刷新. The first --hmr is for webpack, and --configuration=hmr 是让Angular使用 hmr environment.
为了添加Angular 6的PWA支持,并为应用启用离线加载, we can make use of one of the new CLI commands, ng add:
ng add @angular/pwa@0.6.8
请注意,我正在添加版本,因为我编写本教程时的最新版本是 throwing an error. (你可以不使用它试试,看看它是否适用于你 ng add @angular/pwa.)
好了,在我们运行了这个命令之后,我们会看到项目中有很多变化. The most important changes are that it added:
manifest.json in the angular.json 资产文件,以便将其包含在构建输出中,以及 "serviceWorker": true in production buildsngsw-config.json 文件与初始设置缓存应用程序运行所需的所有文件manifest.json meta tag in the index.html filemanifest.json 文件本身,包含应用程序的基本配置ServiceWorkerModule.register('/ngsw-worker.Js ', {enabled:环境.production }) (注意service worker只会在生产环境中启用)因此,这意味着当用户第一次访问URL时,文件将被下载. After that, 如果用户试图在没有网络服务的情况下访问URL, 该应用程序仍然可以通过提取这些缓存文件来工作.
到目前为止,我们已经完成了初始设置,并准备开始构建应用程序. 要使用已经构建的组件,我们可以使用 Angular 6版本的Material.
为了安装 material package on our app, we’ll again make use of ng add:
添加@angular/material
运行之后,我们会看到添加了一些新包和一些基本的样式配置:
index.html includes the Roboto font and Material iconsBrowserAnimationsModule is added to our AppModule
angular.json has the indigo-pink theme already included for us
您需要重新启动 ng serve 接住主题,或者你也可以 选择另一个预构建的主题.
为了获得初始侧室布局,我们将使用Material附带的原理图. 但如果你想的话也没关系 使用不同的布局.
(In a nutshell, schematics 允许您对项目应用转换:您可以根据需要创建、修改或删除文件. 在这种情况下,它为我们的应用程序搭建了一个侧边布局.)
生成@angular/material:material-nav——name=my-nav
这将创建一个sidenav组件,并准备启动最小设置. Isn’t that great?
它还包括了所有必要的模块 app.module.ts.

Since we are using SCSS, we need to rename the my-nav.component.css file to my-nav.component.scss, and in my-nav.component.ts 更新相应的参考 styleUrls to use the new name.
Now to make use of the new component, let’s go to app.component.html and remove all the initial code, leaving just:
当我们回到浏览器时,我们将看到以下内容:

让我们更新链接,使其只包含我们想要的两个选项.
First, let’s create two new components:
ng g c AddMemory
生成@angular/material:material-table——name=view-memories
(第二个是用于创建表格的Material原理图.)
Next, on my-nav we’ll update to set up the links and include the
Menu
Add Memory
View My Memories
my-memories
Also, in app.component.html we need to update it to just have the main
Next, on the AppModule 我们将包括以下路线:
从“@angular/router”中导入{RouterModule, Routes};

// ...

imports: [
  // ...
  RouterModule.forRoot([
    {
      path: '', component: MyNavComponent, children: [
        {path: 'add-memory', component: AddMemoryComponent},
        {path: 'view-memories', component: viewmemorescomponent}
      ]
    },
  ]),
]
注意,我们正在设置 MyNavComponent 作为父组件和我们创建的两个组件作为子组件. 这是因为我们包含了 MyNavComponent每当我们到达这两个路由中的一个时,我们就会渲染子组件
After this, when we serve the app we should see:

好了,现在让我们创建表单来将新的记忆保存到我们的日记中.
我们需要导入一些材料模块和表单模块到我们的 app.module.ts:
import { FormsModule } from '@angular/forms';
导入{MatCardModule, MatFormFieldModule, MatInputModule, MatDatepickerModule, MatNativeDateModule } from '@angular/material';

// ...

Imports:[
  // ...
  MatCardModule,
  MatFormFieldModule,
  MatInputModule,
  MatDatepickerModule,
  FormsModule,
  MatNativeDateModule,
  // ...
]
And then in add-memory.component.html, we’ll add the form:
{{ memory | json }}
Here we are using a mat-card 加上两个字段,a date and a textarea.
注意,我们使用 [(ngModel)]. This Angular directive will bind the memory.date expression and the memory 属性相互转换,稍后我们会看到. ([(ngModel)] is syntactic sugar—a shortcut to perform two-way data binding 从类到视图再从视图到类. This means when you input text in the view, memory.date 将在类实例中反映这些更改,如果对 memory.date 在类实例中,视图将反映更改.)
In the add-memory.component.ts,代码看起来像这样:
从“@angular/core”中导入{Component, OnInit};

@Component({
 选择器:“app-add-memory”,
 templateUrl: './add-memory.component.html',
 styleUrls: ['./add-memory.component.scss']
})
导出类AddMemoryComponent实现OnInit {

  memory: any = {};

  constructor() { }

  ngOnInit() {

  }

  onSubmit() {
    console.log(this.memory);
  }
}
这里,我们初始化 memory property bound via ngModel.
When the AddMemoryComponent 组件被实例化, memory 将是一个空对象. Then when the ngModel 指令运行时,它将能够将输入值赋给 memory.date and memory.text. If we wouldn’t do this, we would get an error of Cannot set property 'date/text' of undefined.
Meanwhile, add-memory.component.scss needs to have:
.memory-card {
   min-width: 150px;
   max-width: 400px;
   width: 100%;
   margin: auto;
}

.mat-form-field {
   width: 100%;
}
Since we have {{ memory | json }} memory in the view. 如果我们打开浏览器,下面是目前的结果:

在视图中,我们绑定了表单via (ngSubmit) =“onSubmit()” to the onSubmit function in the class.
 onSubmit() {
   console.log(this.memory);
 }
所以当你点击“拯救我。!按钮,您将获得发送到控制台日志的用户输入的内部表示:

我们接下来要做的是将我们的项目连接到Firebase以保存我们的记忆.
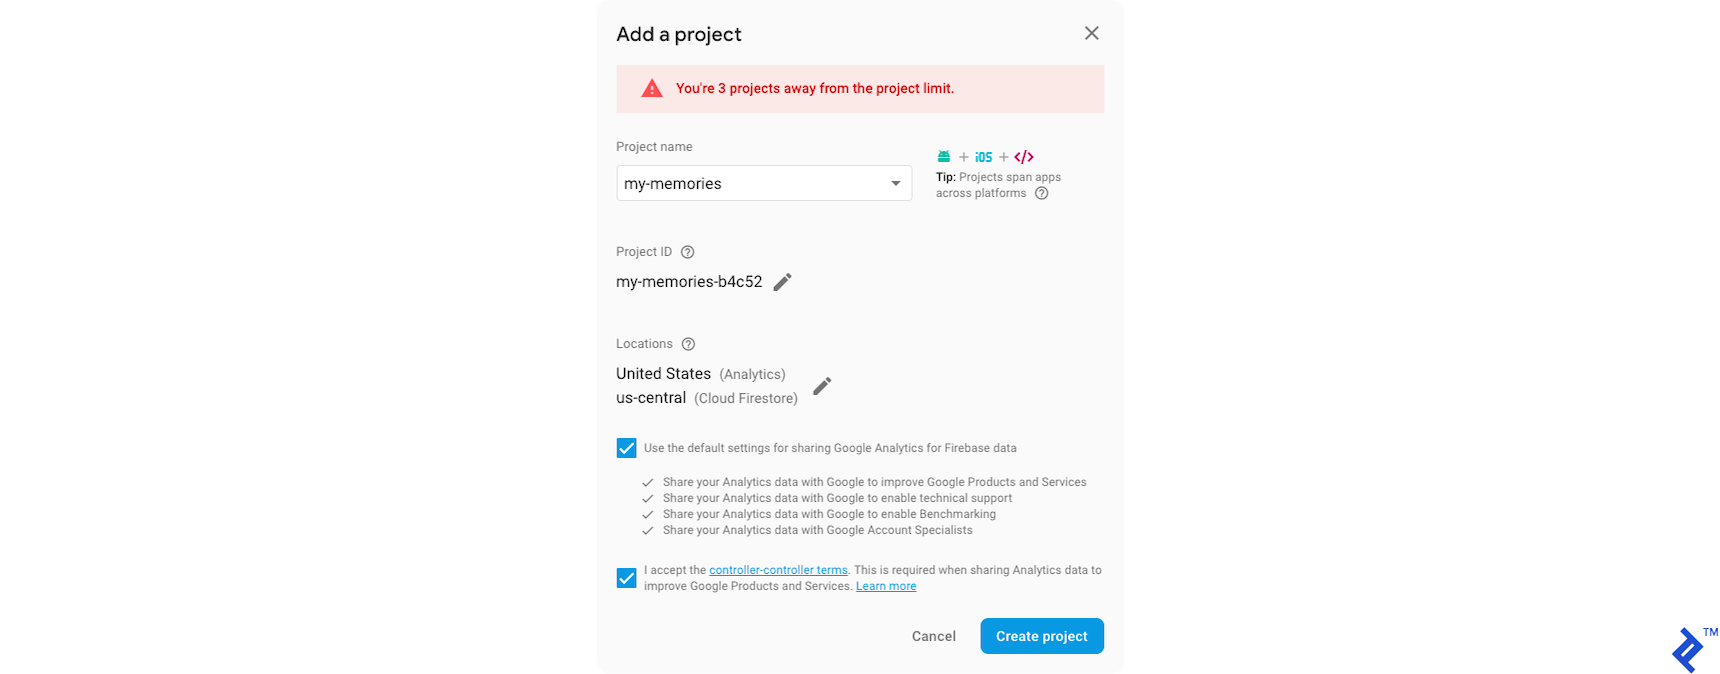
First, we’ll go to the Firebase console 然后在那里创建一个项目.
其次,我们将安装 firebase and angularfire2 packages:
npm install firebase angularfire2 --save
And then in each of these three files:
/ src /环境/环境.ts/ src /环境/环境.hmr.ts/ src /环境/环境.prod.ts我们将添加Firebase配置:
导出const环境= {
// ...
  firebase: {
    apiKey: '',
    authDomain: '',
    databaseURL: '',
    projectId: '',
    storageBucket: '',
    messagingSenderId: ''
  }
};
您可以通过单击项目概述页面上的“将Firebase添加到您的web应用程序”来获取上述文件所需的配置细节.
之后,我们将在我们的 app.module.ts:
从'angularfire2'中导入{AngularFireModule};
从'angularfire2/database'导入{AngularFireDatabaseModule};
从“导入{环境}”../环境/环境”;

// ...

Imports:[
// ...
   AngularFireModule.initializeApp(环境.firebase),
   AngularFireDatabaseModule,
// ...
]
And in add-memory.component.ts,我们在构造函数中注入数据库,并将表单中的值保存到数据库中. 当Firebase的推送承诺成功时, 我们在控制台中记录成功并重置模型:
从'angularfire2/database'导入{AngularFireDatabase};
// ...
constructor(private db: AngularFireDatabase) { }
// ...
 onSubmit() {
   this.memory.date = new Date(this.memory.date).valueOf();
   this.db.list('memories').push(this.memory)
     .then(_ => {
       this.memory = {}
       console.log('success')
     })
 }
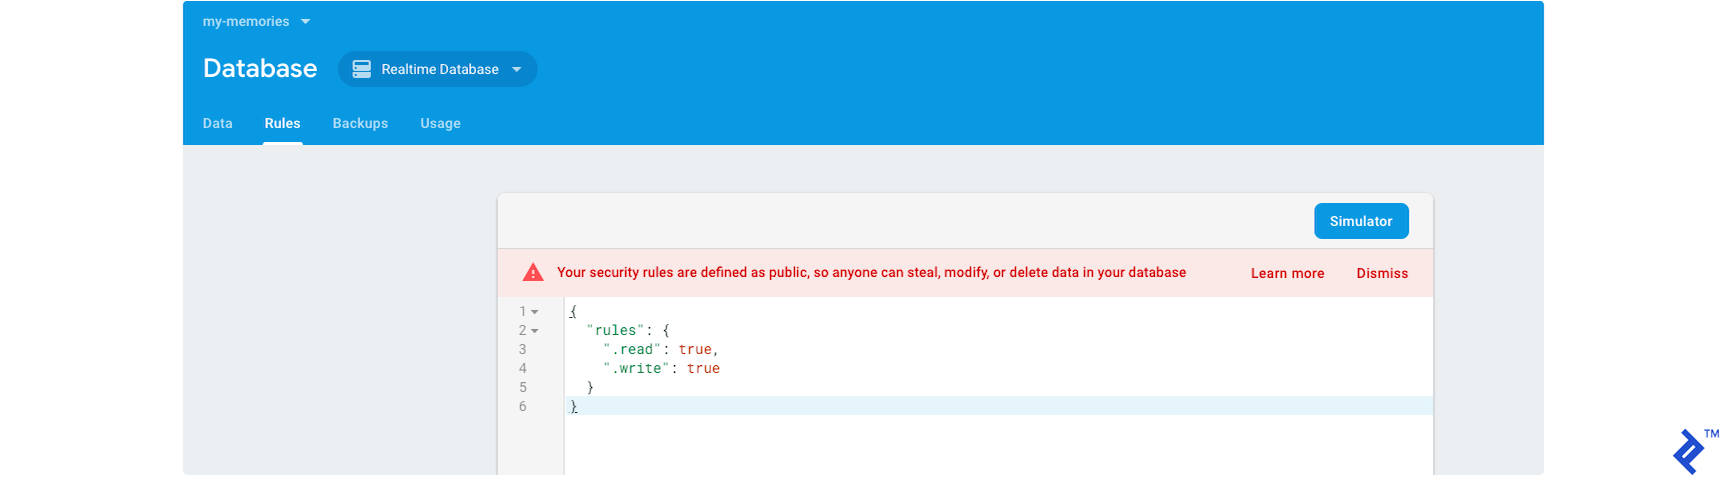
您需要允许对数据库规则进行公共访问, so anonymous users can read from and write to it. Please note 有了这个设置,任何用户都可以读取/更改/删除你的应用数据. Make sure you 在投入生产之前设置相应的规则.
此外,要获取环境更改,您需要重新启动 ng serve process.
Now, 当我们回到浏览器,点击保存按钮, we’ll see the memory was added to the database:

让我们看看如何检索我们的记忆并在Material表中显示它们.
Back when we created the table using 生成@angular/material:material-table——name=view-memories’,我们就自动得到了一个文件 view-memories/view-memories-datasource.ts`. 该文件包含假数据,因此我们需要更改它以开始从Firebase中提取.
In view-memories-datasource.ts, we’ll remove the EXAMPLE_DATA 并设置一个空数组:
export class ViewMemoriesDataSource extends DataSource {
  data: viewmemoresitem [] = [];
// ...
And in getSortedData 我们将更新字段名:
private getSortedData(data: viewmemoresitem []) {
  if (!this.sort.active || this.sort.direction === '') {
    return data;
  }
  return data.sort((a, b) => {
    const isAsc = this.sort.direction === 'asc';
    switch (this.sort.active) {
      Case 'text': return compare(a.name, b.name, isAsc);
      Case 'date':返回compare(+a).id, +b.id, isAsc);
      default: return 0;
    }
  });
}
In view-memories.component.html 我们将把列的名称更新为 date and text from our memory model. 请注意,由于我们将日期保存为毫秒格式, 这里我们使用日期管道将值转换为更人性化的日期格式. 最后我们移除 [length]="dataSource.data.length" 从分页器,因为我们将从Firebase异步加载数据:
     Date
     {{row.date | date:'short'}}


     Text
     {{row.text}}
Change the view-memories.component.css to view-memories.component.scss 并设置表格样式:
table{
   width: 100%;
}
In view-memories.component.ts, we’ll change the styleUrls 以反映上述重命名为 ./view-memories.component.scss. We’ll also update the displayedColumns array to be ['date', 'text'] 并设置表数据源以从Firebase获取数据.
这里发生的事情是,我们订阅了内存列表,当我们收到数据时,我们实例化 ViewMemoriesDataSource 用来自Firebase的数据设置它的data属性.
this.subscription = this.db.list('memories').valueChanges().subscribe(d=>{
  console.日志(“数据流”);
  this.dataSource = new ViewMemoriesDataSource(this.paginator, this.sort);
  this.dataSource.data = d;
});
Firebase returns a ReactiveX样式的可观察数组.
Note we are casting this.db.list-从 'memories' path—to ViewMemoriesItem. 这是由 angularfire2 library.
We also included the unsubscribe call within the onDestroy hook of the Angular component lifecycle.
从“@angular/core”中导入{Component, OnInit, ViewChild, OnDestroy};
从“@angular/material”中导入{MatPaginator, MatSort};
import {viewmemoresdatasource, viewmemoresitem} from./ view-memories-datasource”;
从'angularfire2/database'导入{AngularFireDatabase};
import { Subscription } from 'rxjs';
import { map, first } from 'rxjs/operators';

@Component({
  选择器:“app-view-memories”,
  templateUrl: './view-memories.component.html',
  styleUrls: ['./view-memories.component.scss']
})
导出类viewmemorescomponent实现OnInit, OnDestroy{
  @ViewChild(MatPaginator) paginator: MatPaginator;
  @ViewChild(MatSort): MatSort;
  dataSource: ViewMemoriesDataSource;

  /**表显示的列. Columns IDs can be added, removed, or reordered. */
  displayedColumns = ['date', 'text'];
  订阅:订阅;


  constructor(private db: AngularFireDatabase) {

  }

  ngOnInit() {
    this.subscription = this.db.list('memories').valueChanges().subscribe(d=>{
      console.日志(“数据流”);
      this.dataSource = new ViewMemoriesDataSource(this.paginator, this.sort);
      this.dataSource.data = d;
    });
  }

  ngOnDestroy(): void {
    this.subscription.unsubscribe();
  }
}
现在,为了使我们的应用程序运行,让我们将其部署到Firebase Hosting. 为此,我们将安装Firebase CLI,它使 firebase command available:
NPM install -g firebase-tools
Now we can use Firebase CLI to log in:
firebase login
这将提示您选择您的谷歌帐户.
接下来,我们将初始化项目并配置Firebase Hosting:
firebase init
We’ll just select the Hosting option.
接下来,当我们被要求输入路径时,我们将其设置为 dist/my-memories. 当我们被问及是否将其配置为单页面应用程序(i.e. rewrite all URLs to /index.html), we’ll respond “yes.”
Finally, we’ll hit, “File dist/my-memories/index.html already exists. Overwrite?” Here we’ll say “no.”
This will create the Firebase config files .firebaserc and firebase.json 使用所提供的配置.
最后一步是运行:
ng build --prod
firebase deploy
And with that, we will have published the app to the Firebase, which provides a URL for us to navigate to, like http://my-memories-b4c52.firebaseapp.com/view-memories, where you can view my own published demo.
Wow, you’ve been through the tutorial! I hope you enjoyed it. 你也可以退房 完整的代码在GitHub上.
Angular是构建web应用的一个非常强大的框架. 它已经存在了很长一段时间,并且已经证明了自己的小, simple apps and large, complex ones alike—Angular 6 is no exception here.
Going forward, Angular计划继续改进和遵循新的web范例,比如web组件(Angular Elements)。. 如果你对构建混合应用程序感兴趣,你可以去看看 Ionic, which uses Angular as its underlying framework.
本教程介绍了开始使用Angular、Material和 Firebase. 但是您应该在实际应用中考虑到这一点, 您需要添加验证, 并使您的应用程序更易于维护和扩展, 您可能希望遵循诸如使用服务之类的最佳实践, reusable components, etc. 这将成为另一篇文章的主题——希望如此, 这篇文章足以激起你对Angular开发的兴趣!
AngularJS—simply “Angular” nowadays, since version 2—is used to build web apps, 渐进式web应用(pwa), 以及混合移动应用程序. Angular框架自带了所有必要的功能(比如路由), security, forms, 和测试)来快速构建单页面应用程序(SPA).
Angular组件是一种特殊的指令. They bind a view with class via a decorator. 视图是一个HTML模板, and from the class, 您可以控制和响应与视图的任何交互.
Angular is a JavaScript (JS) framework, 具有完整的内置功能,用于构建web应用程序. TypeScript is JS的类型化超集. 它被编译为普通JS,并得到Angular的支持.
使用Angular,你可以构建可伸缩的、高性能的web应用. Angular allows you to build reusable, 可测试的组件,这将允许您进行更改和维护您的应用程序很容易.
Angular CLI是它的命令行界面,为大多数常见的操作提供命令. Examples include generating components, pipes, and directives; adding dependencies; and creating new projects.
热模块替换(HMR)是一个webpack特性,允许您在不完全刷新浏览器的情况下替换模块. 避免额外的步骤和由此导致的延迟意味着您可以更快地编码和测试您的更改.
Firebase实时数据库是谷歌基于云的NoSQL数据库. 你可以用它来保存数据并自动同步到用户的设备上. Firebase数据库允许您快速构建应用程序,而不需要自己的后端. Firebase有很多产品可以帮助构建无服务器应用程序.
Located in Rosario, Santa Fe Province, Argentina
Member since May 2, 2018
Joaquin是一名全栈和混合移动应用程序开发人员,在WebMD和Getty Images等公司工作了超过12年的经验.
 作者都是各自领域经过审查的专家,并撰写他们有经验的主题. 我们所有的内容都经过同行评审,并由同一领域的Toptal专家验证.
World-class articles, delivered weekly.
World-class articles, delivered weekly.
Join the Toptal® community.
